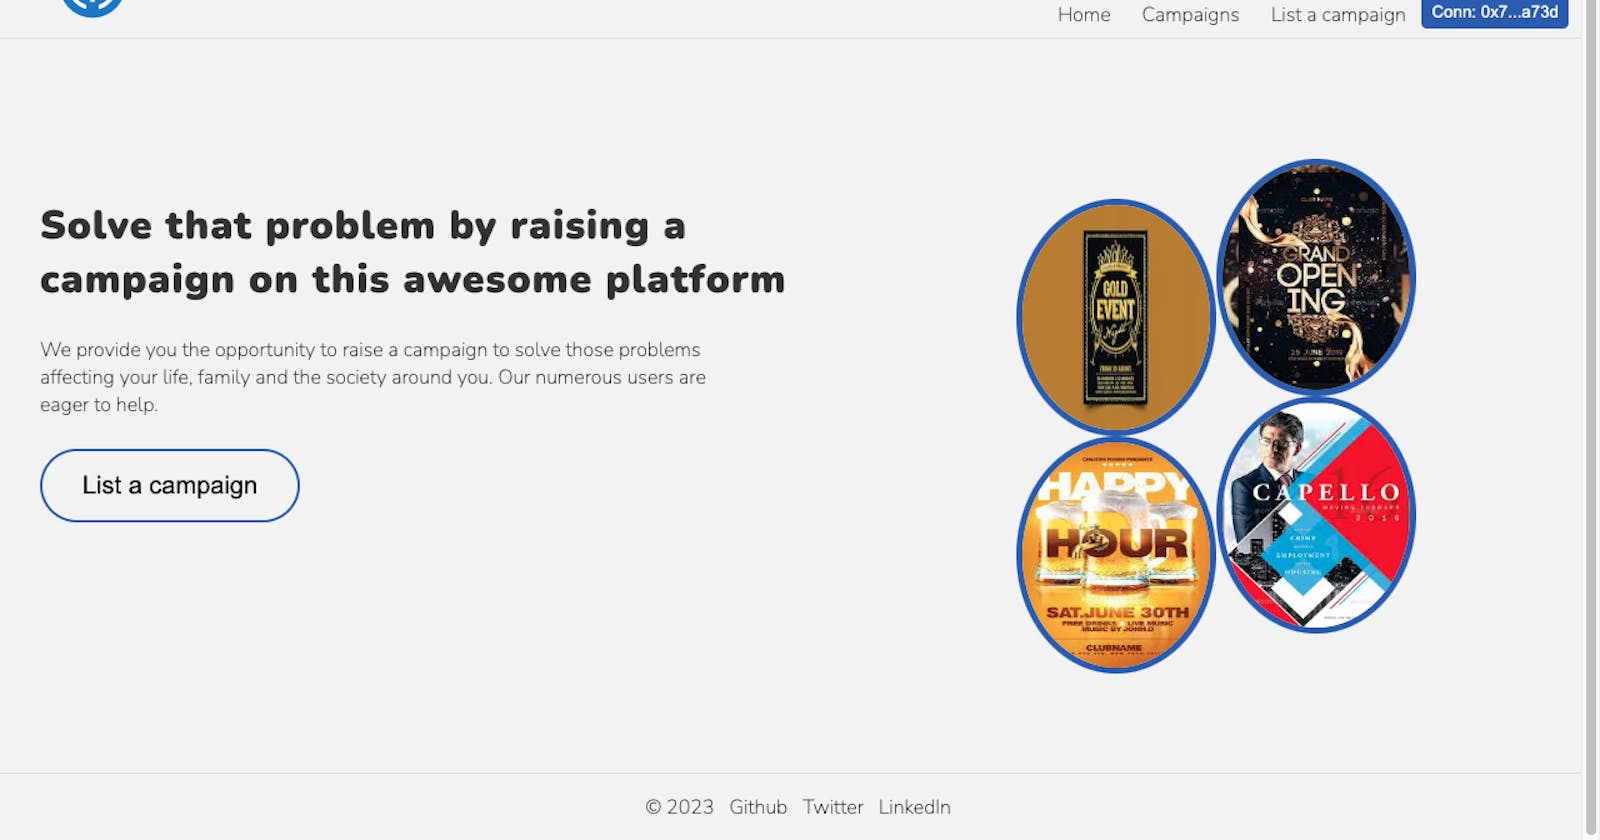
In this article, we'll be learning how to build, deploy and interact with a USDC-based Crowdfund Smart contract. We'll also build a Dapp for our smart contract using Ethers.js and Next.js.
Now let's go into the details...
Prerequisites
Ensure you have Node installed on your PC.
Basic understanding of Javascript/ React.js
Ensure you have metamask installed.
What is USDC?
USD Coin (USDC) is a digital currency that is fully backed by U.S. dollar assets. USDC is a tokenized U.S. dollar, with the value of one USDC coin pegged 1:1 to the value of one U.S. dollar. The value of USDC is designed to remain stable, making USDC a stablecoin.
Why use USDC?
Stablecoins are commonly backed by reserve assets like dollars or euros to achieve price stability. The price stability of USDC contrasts sharply with the notorious price fluctuations of other cryptocurrencies like Bitcoin and Ethereum. So due to these fluctuations in price, using stable cryptocurrencies like USDC is preferable for storing value and also carrying out transactions.
Building a USDC-based Crowdfund Smart Contract
Now let's write, compile and deploy our smart contract on the Ethereum Goerli Test network. We'll also be using the remix online editor for it.
Writing the smart contract.
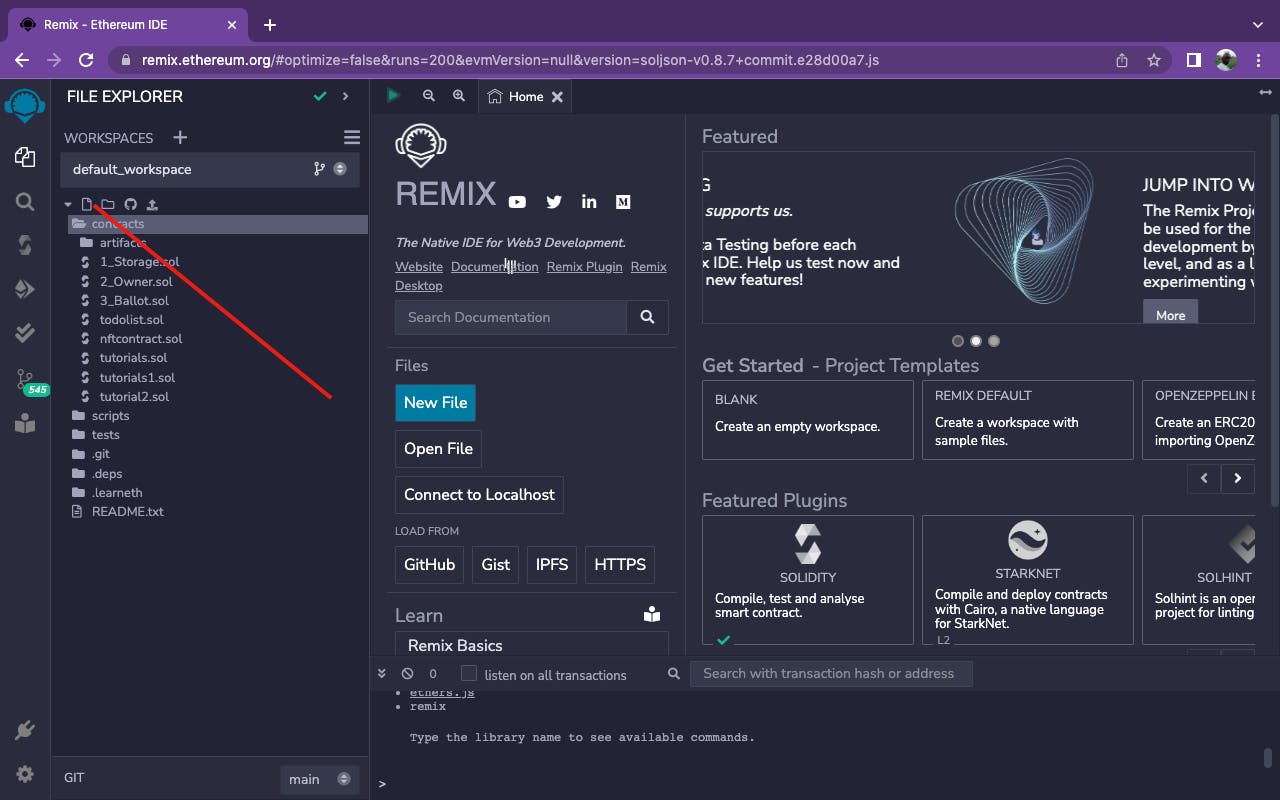
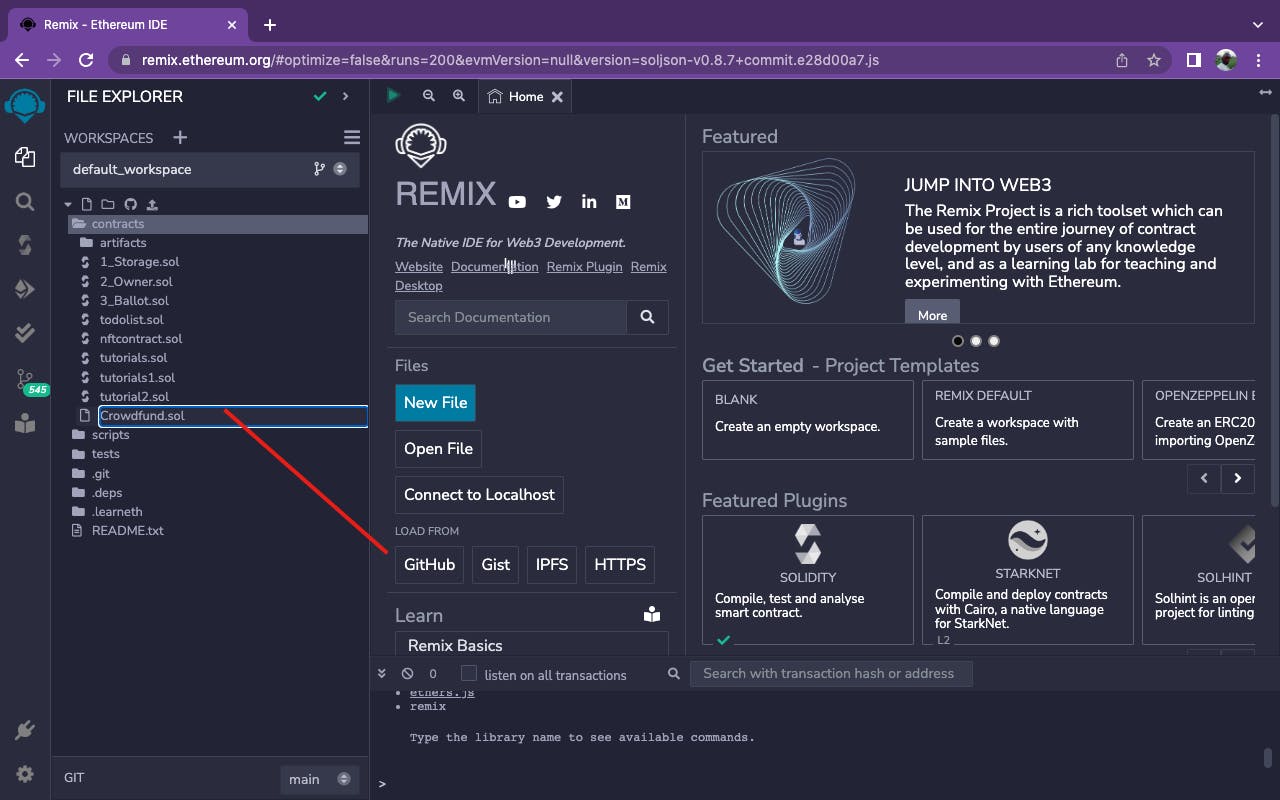
Open remix and create a new file named Crowdfund.sol as shown below;
Then, copy the code below and paste it into your file.
// SPDX-License-Identifier: GPL-3.0

pragma solidity ^0.8.11;

// USDC contract interface
interface USDC {
function balanceOf(address account) external view returns (uint256);
function allowance(address owner, address spender) external view returns (uint256);
function transfer(address recipient, uint256 amount) external returns (bool);
function approve(address spender, uint256 amount) external returns (bool);
function transferFrom(address sender, address recipient, uint256 amount) external returns (bool);
}

contract usdcCrowdfund {
 // instance of the usdc token for the contract
  USDC public usdc;

 // Contract Owner
 address payable public owner;

 // id for campaigns
 uint public id;

// mapping to store listed campaigns
mapping(uint=>Campaign) public campaigns;

// mapping to store amount pledged by an address to a particular campaign
mapping(uint=>mapping(address=>uint)) public pledgeAmount;


// How an individual campaign is structured
    struct Campaign{
        address payable Owner;
        uint CampaignNo;
        string Title;
        string Purpose;
        uint Target;
        uint StartTime;
        uint EndTime;
        uint Raised;
        bool Withdrawn;

    }

constructor(address usdcContractAddress) {
        usdc = USDC(usdcContractAddress);
        owner = payable(msg.sender);
  // USDC contract:0x07865c6e87b9f70255377e024ace6630c1eaa37f
    }

    // function to list/open a campaign
function listCampaign(string memory _title, string memory _purpose, uint _target, uint _starttime, uint _endtime ) public {

   uint starting = block.timestamp + (_starttime * 1 minutes);
   uint ending = starting + (_endtime * 1 minutes);
   uint target = _target *(10 ** 6);
   require(msg.sender != address(0),"Not a valid address");
   require(_target > 0, "target must be greater than 0");
   require(ending > starting, "invalid start time");

        // increase the id count
        id +=1;

// update the campaign at this id with the the campaign structure
       campaigns[id] = Campaign({
            Owner: payable (msg.sender),
            CampaignNo: id,
            Title: _title,
            Purpose: _purpose,
            Target: target,
            StartTime: starting,
            EndTime: ending,
            Raised: 0,
            Withdrawn: false
        });

    }


 // function to pledge to a prticular campaign.
function pledge (uint _id, uint _amount) payable public {

//  get the instance of the campaign at that particular id
  Campaign storage campaign = campaigns[_id];

 // convert the input amount into usdc decimals
   uint amount = _amount * (10 ** 6);

  require(block.timestamp > campaign.StartTime, "campaign is yet to start");
  require(block.timestamp <= campaign.EndTime, "campaign closed");

        campaign.Raised += amount;
        pledgeAmount[_id][msg.sender] += amount;
        usdc.transferFrom(msg.sender, address(this), amount);
    }


// function to withdraw amount raised at the end of the campaign
 function withdraw (uint _id) public {
  //  get the instance of the campaign at that particular id
     Campaign storage campaign = campaigns[_id];

// campaign withdrawal amount after 2% tax to the owner of the contract
     uint withdrawAmount = (campaign.Raised * 9800)/10000;

// owner of contract's share
     uint ownerShare = (campaign.Raised * 200)/10000;

// ensure the campaign is over & withdrawer is the owner of the campign and it's not already withdrawn
   require(msg.sender == campaign.Owner, "not owner of campaign");
   require(block.timestamp > campaign.EndTime, "campaign still going on");
   require(!campaign.Withdrawn, "already withdrawn");


// transfer cmapaign owner's share and tax to contract owner
        usdc.transfer(msg.sender, withdrawAmount);
        usdc.transfer(owner, ownerShare);
        campaign.Withdrawn = true;
    }


// Function to view campaigns (this is not gas efficieent anyways)
function seeCampaigns() public view returns(Campaign[] memory) {
        Campaign[] memory arr = new Campaign[](id);
        for(uint i = 0; i < id; i++) {
            arr[i] = campaigns[i+1];
        }
        return arr;
  }


}
In the contract above we have;
The USDC interface, which we will use to interact with the functions of the USDC contract.
The state variables include; the instance of the USDC token, the owner of the contract, Id variable to store the campaign ids.
We also have two mappings;
campaignsandpledgeAmountwhich store the listed campaigns and the amount pledged by an address to a particular campaign respectively.There's a struct for the structure of each campaign.
Our
constructortakes the USDC contract address as an argument and the contract owner is also assigned within.The
listCampignfunction takes the needed parameters for each campaign as arguments which are used to update the structure of that particular campaign and then listed.The
pledgefunction takes care of the pledging for us as it takes the id of the campaign as an argument, then transfers the token(pledged amount) to that particular campaign.There is also a
withdrawfunction that only the owner of a particular campaign can successfully call to withdraw the funds raised by that campaign while paying a 2% tax to the owner of the contract.Finally, we have a
seeCampignsfunction used to read through the campaigns mapping and return an array of all the listed campaigns on the contract. Returning an array, especially the dynamic type is not always advisable as it's not a gas-efficient practice but we'll be using it for this contract.
Compilation of Smart Contract
After that, we compile the code before deploying as shown below;
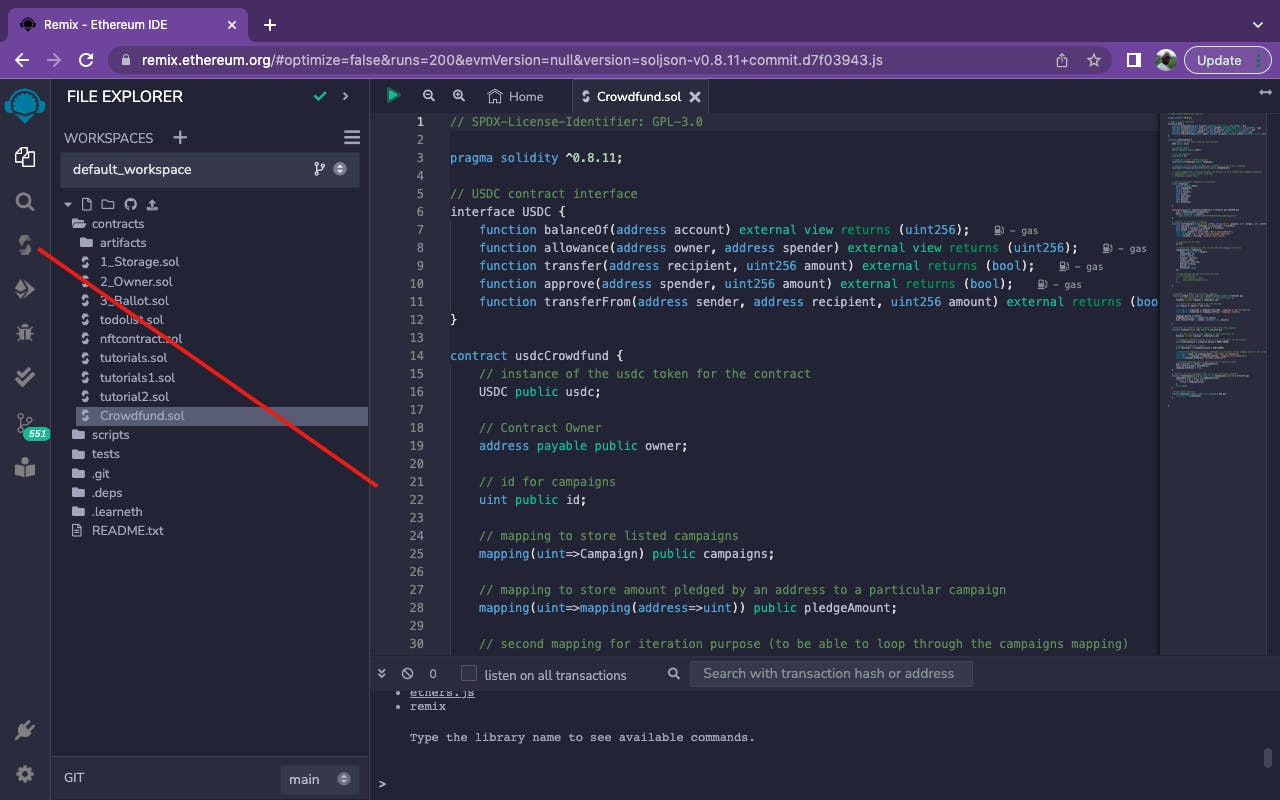
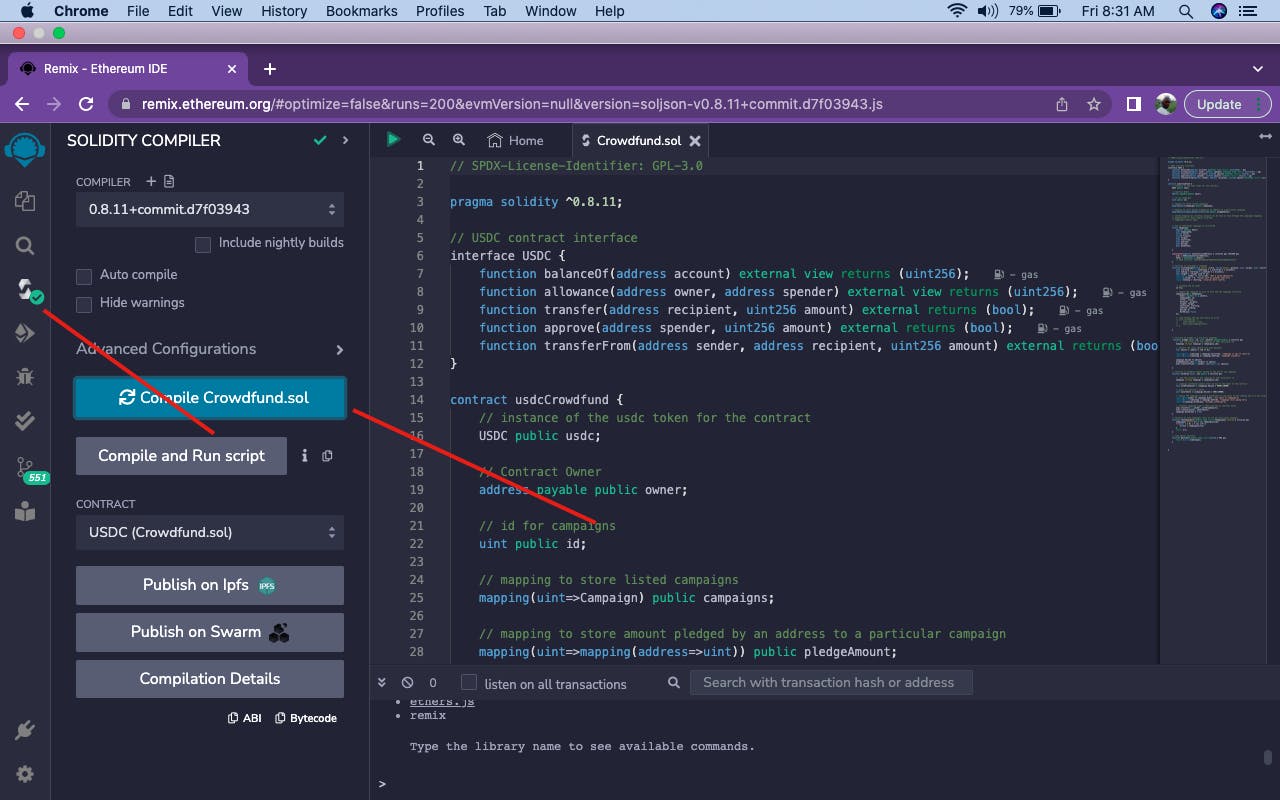
You will see the green tick after successful compilation. Then, we'll go ahead and deploy our contract on the Goerli testnet. Make sure you have enough test tokens for the transactions.
Deploy Smart Contract

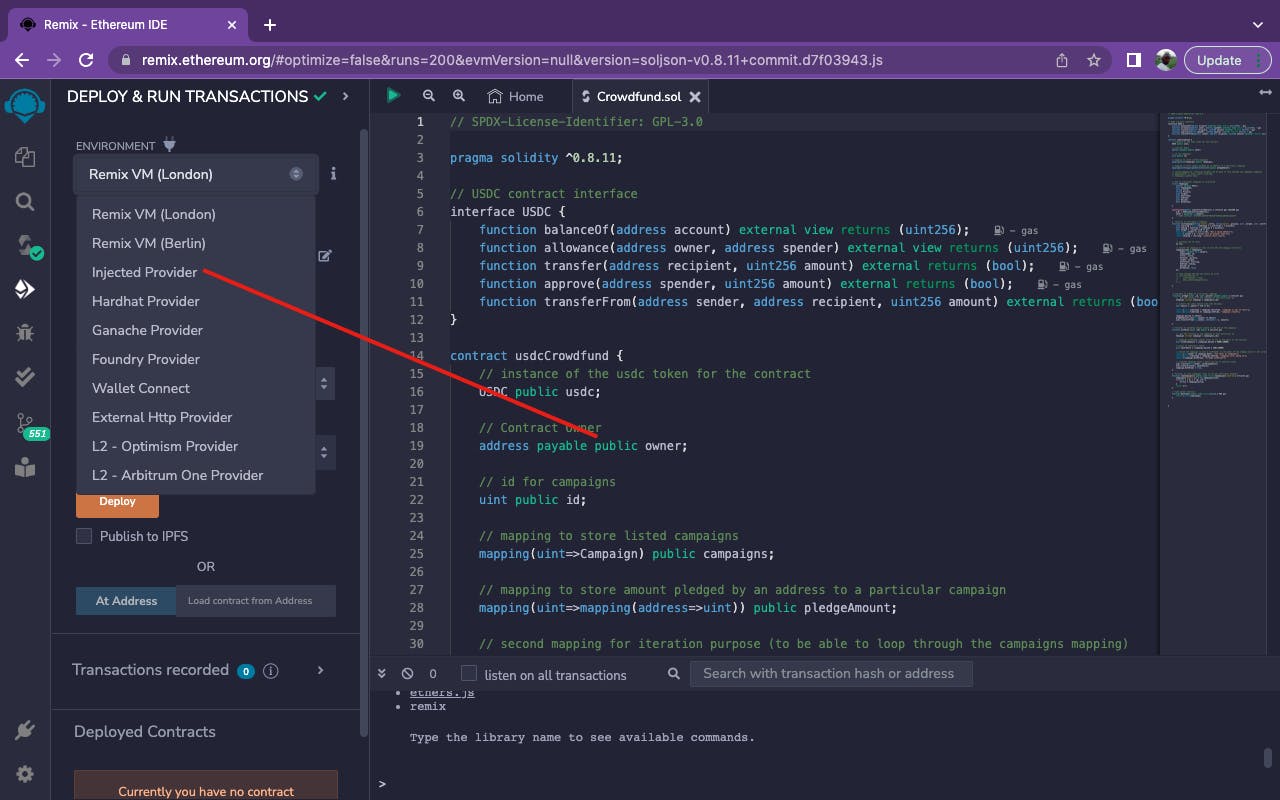
Now connect your metamask by selecting the Injected Provider option as shown below. Make sure your Metamask wallet is set to Goerli testnet.
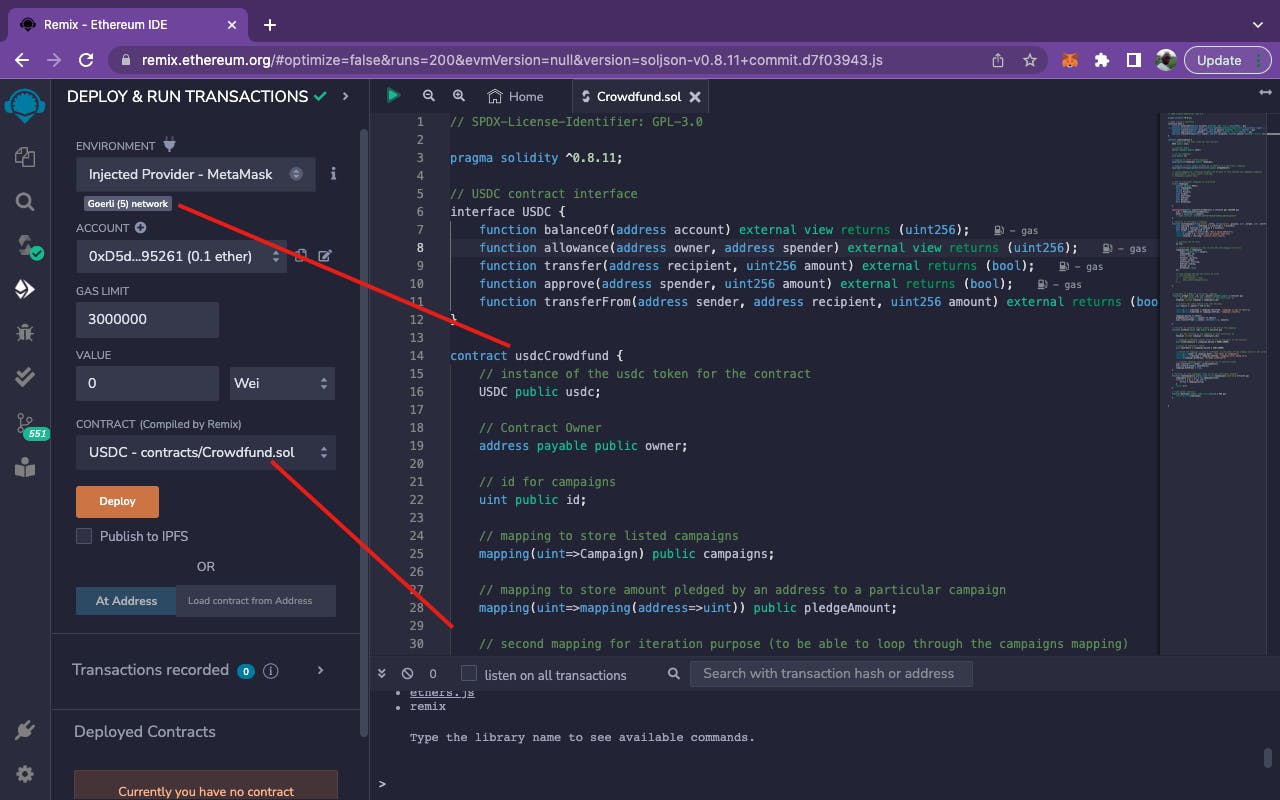
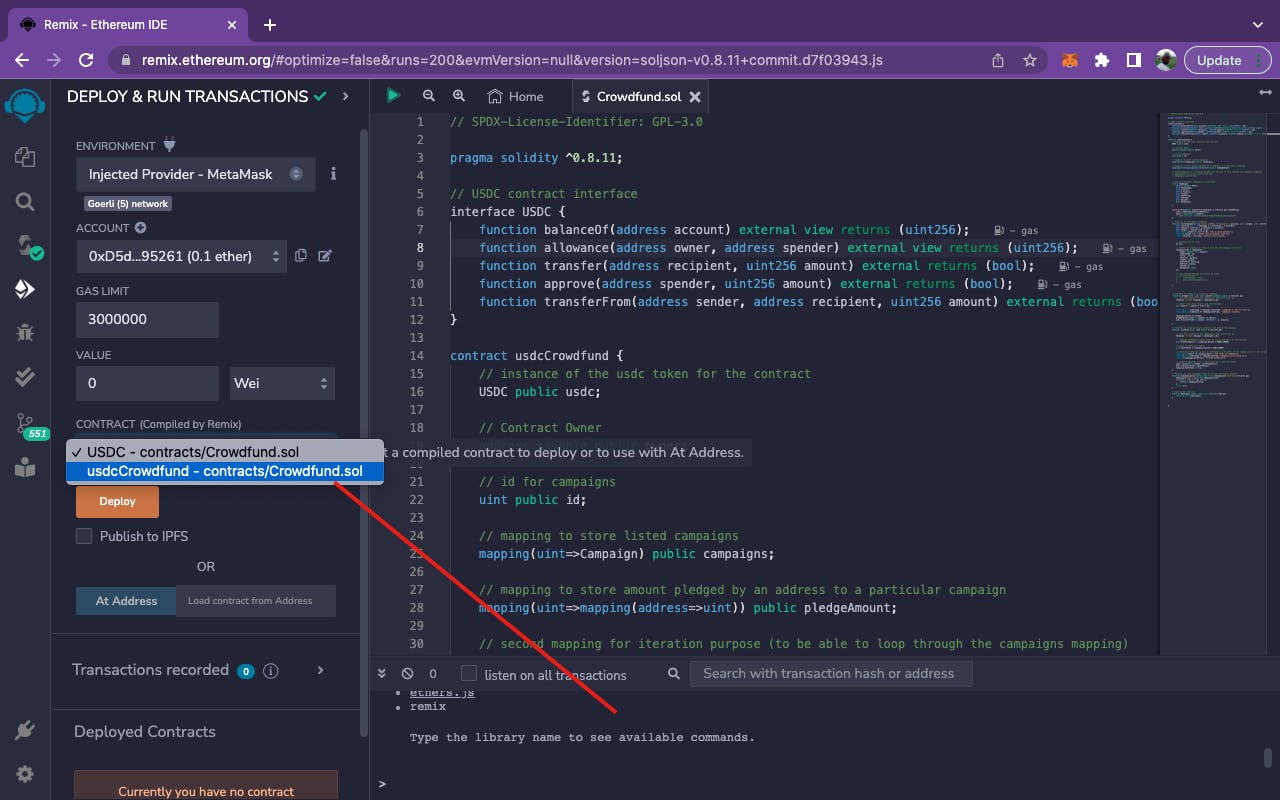
Make sure you select the Crowdfund.sol contract as seen above and copy the USDC contract address: 0x07865c6e87b9f70255377e024ace6630c1eaa37f which will be used to deploy our contract.
Now let's deploy our contract as shown below;
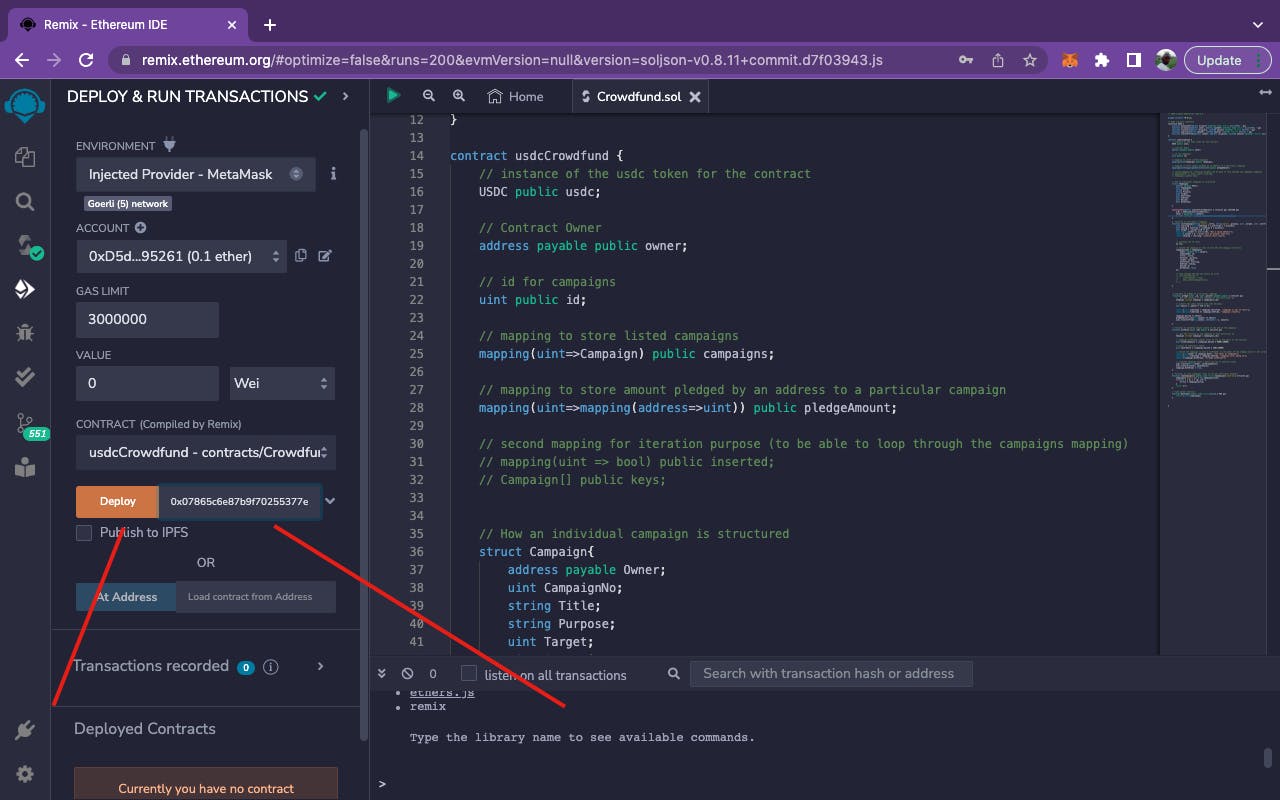
Paste the USDC contract address and click on the Deploy button as shown above. Then, go ahead and approve the transaction on your metamask.
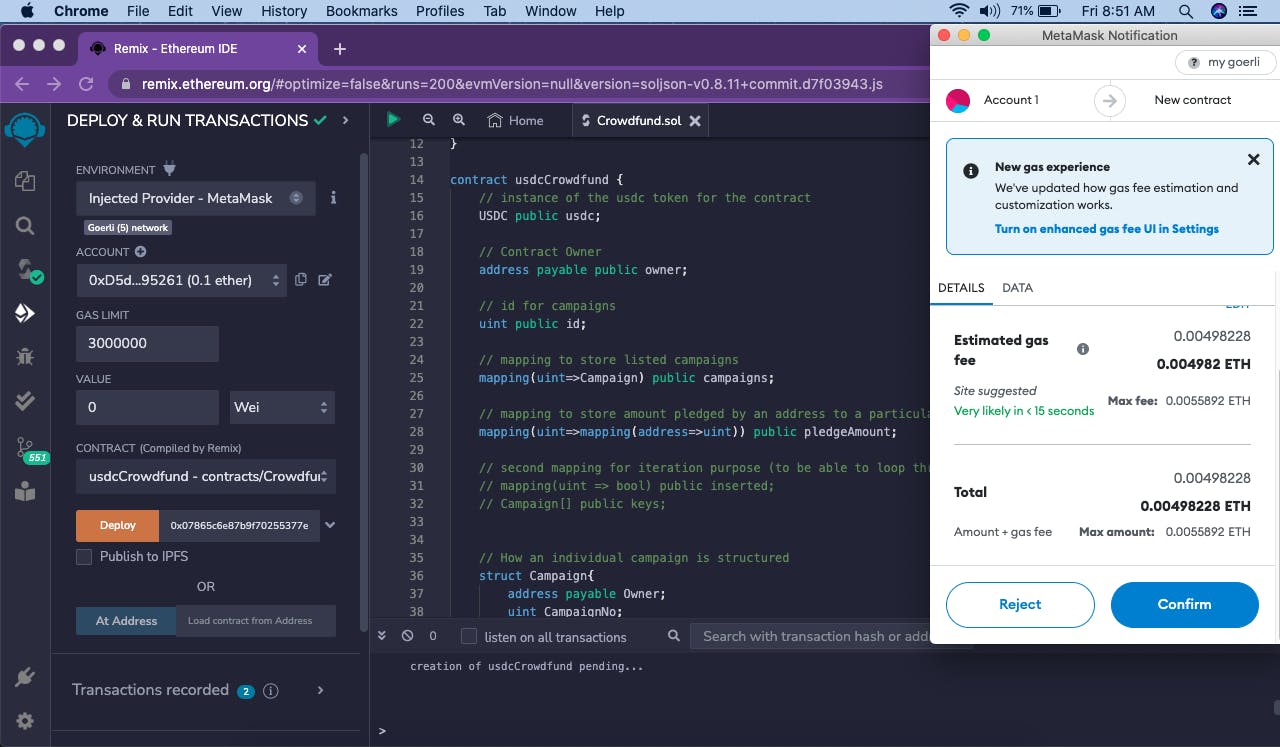
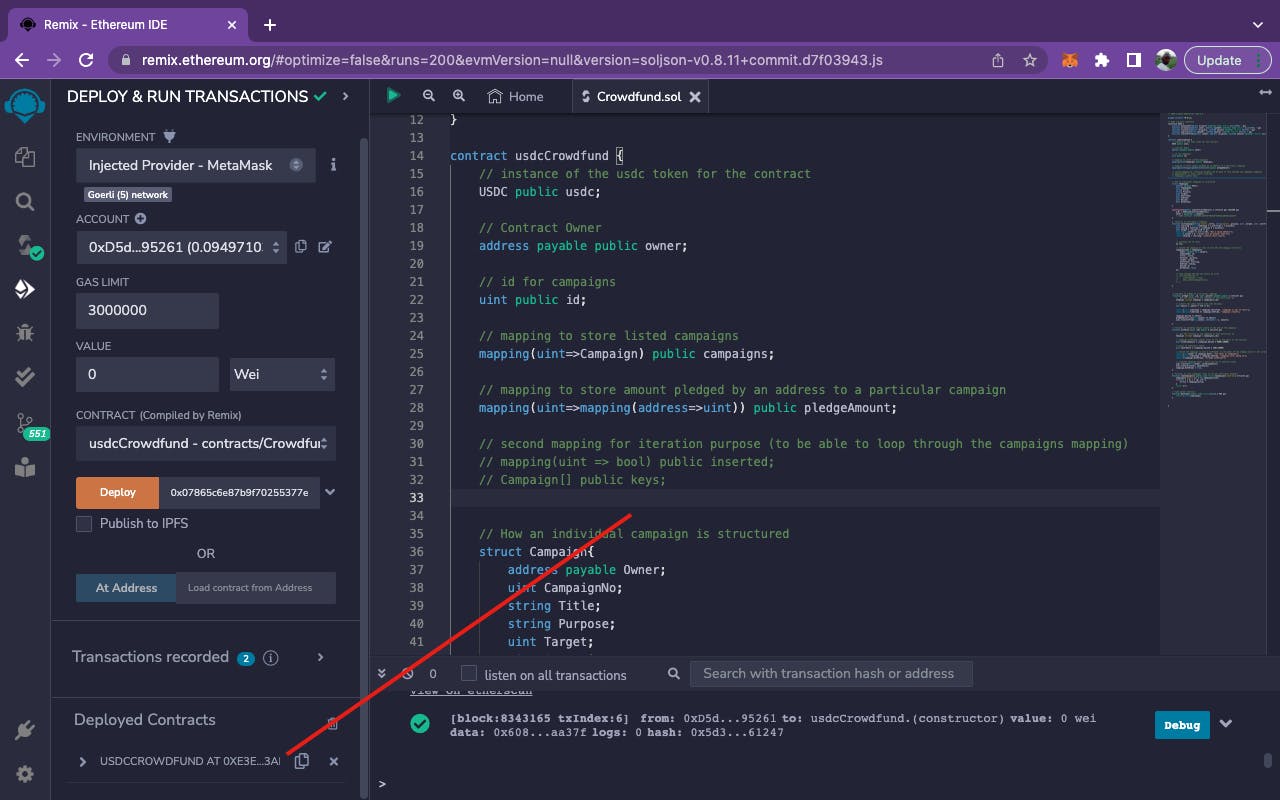
After approving the transaction, we wait for it to be mined and Yes! our contract has been deployed on the Goerli testnet as shown below;
Building the front end.
For the front end, we'll be using next.js but no step-by-step instructions on how to build it because this article would be very long and boring. Just visit this Github repository and clone it.
Next is to open this project on your text editor, open the terminal on your text editor and run the following commands;
npm install && npm run dev
The above commands will open the project on your localhost port 3000.
Go back to your Remix editor and copy your deployed contract address and abi then update the cloned repo with them.
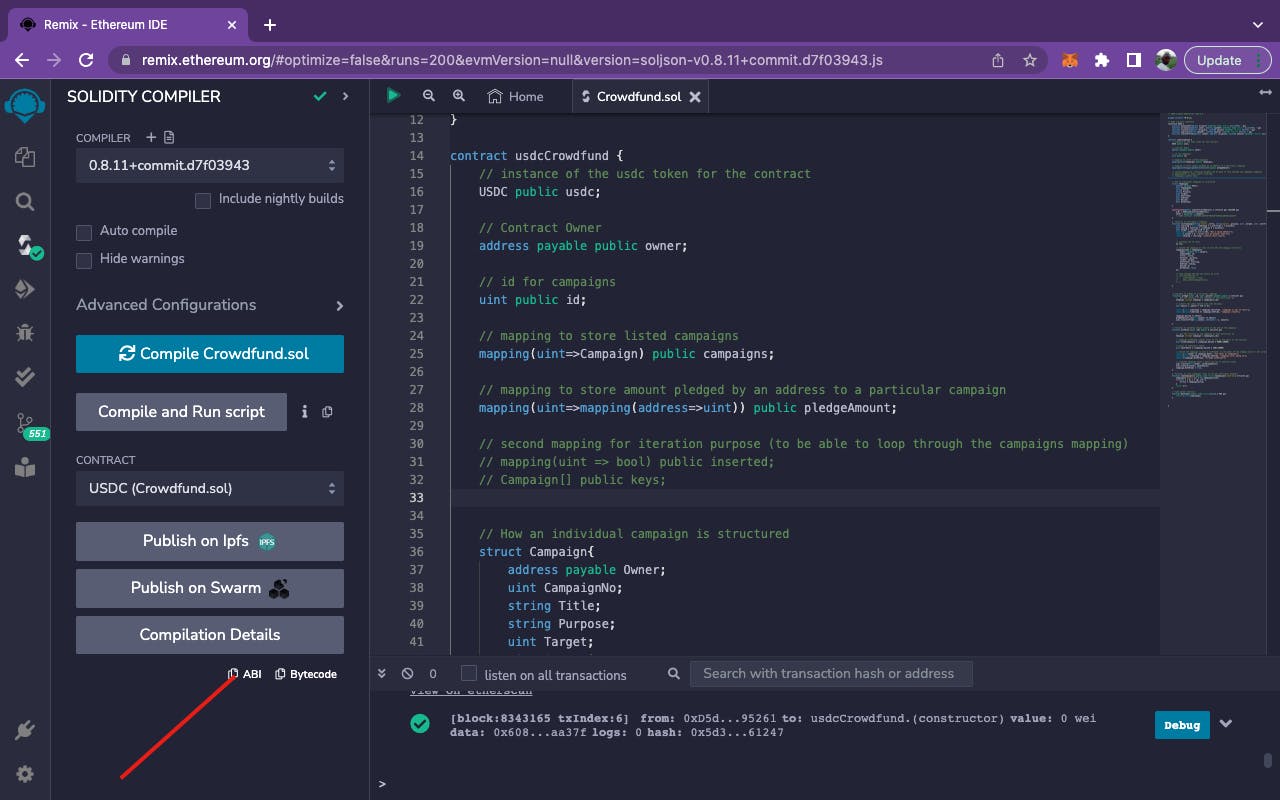
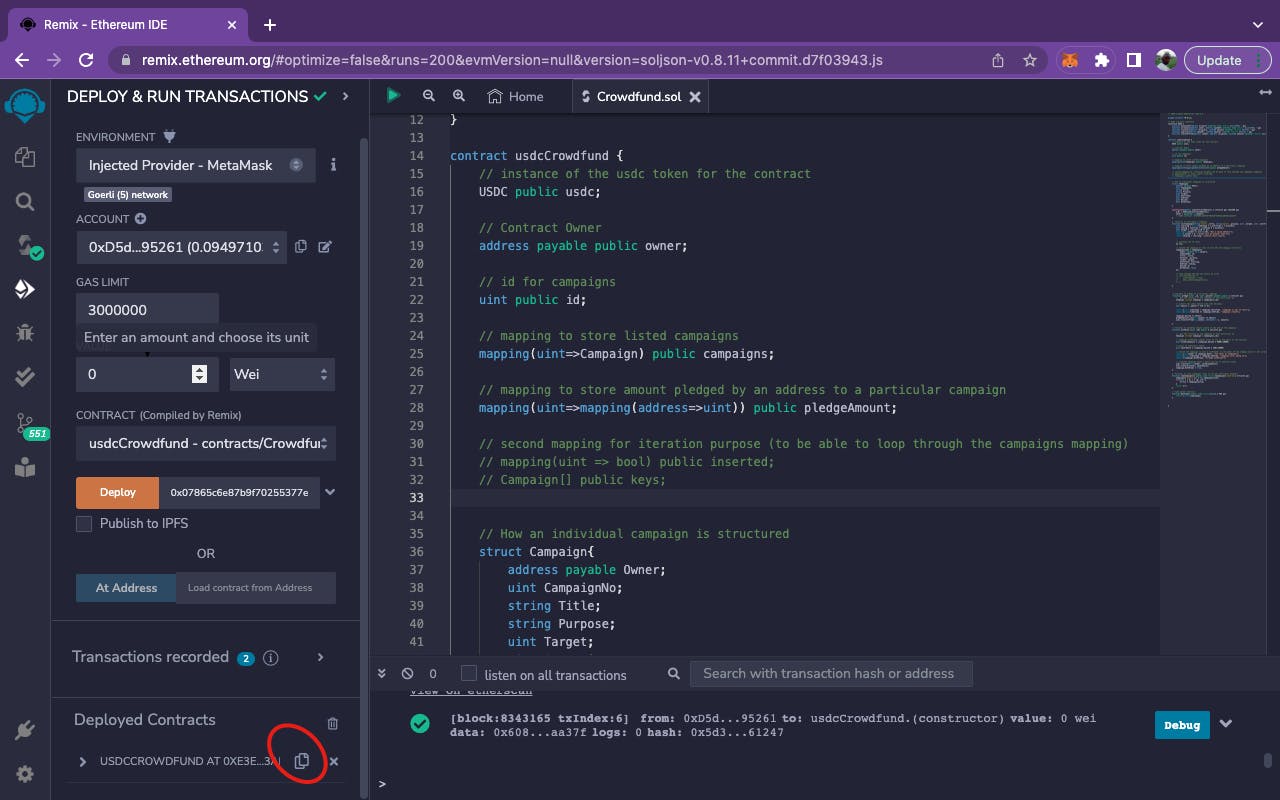
Now that you copied them, navigate to your cloned repo and update them respectively.
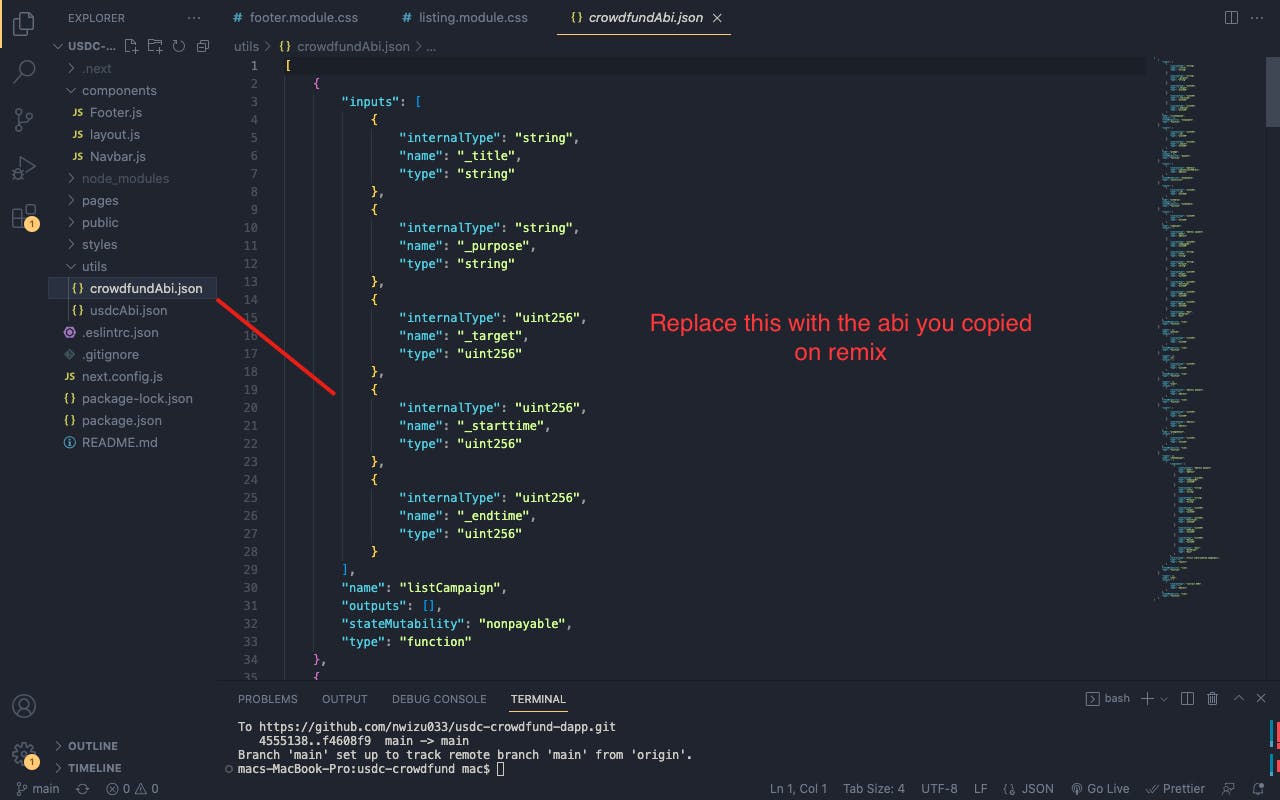
For the abi, navigate to the utils folder and update the crowdFundAbi.json file with the abi you copied from remix.
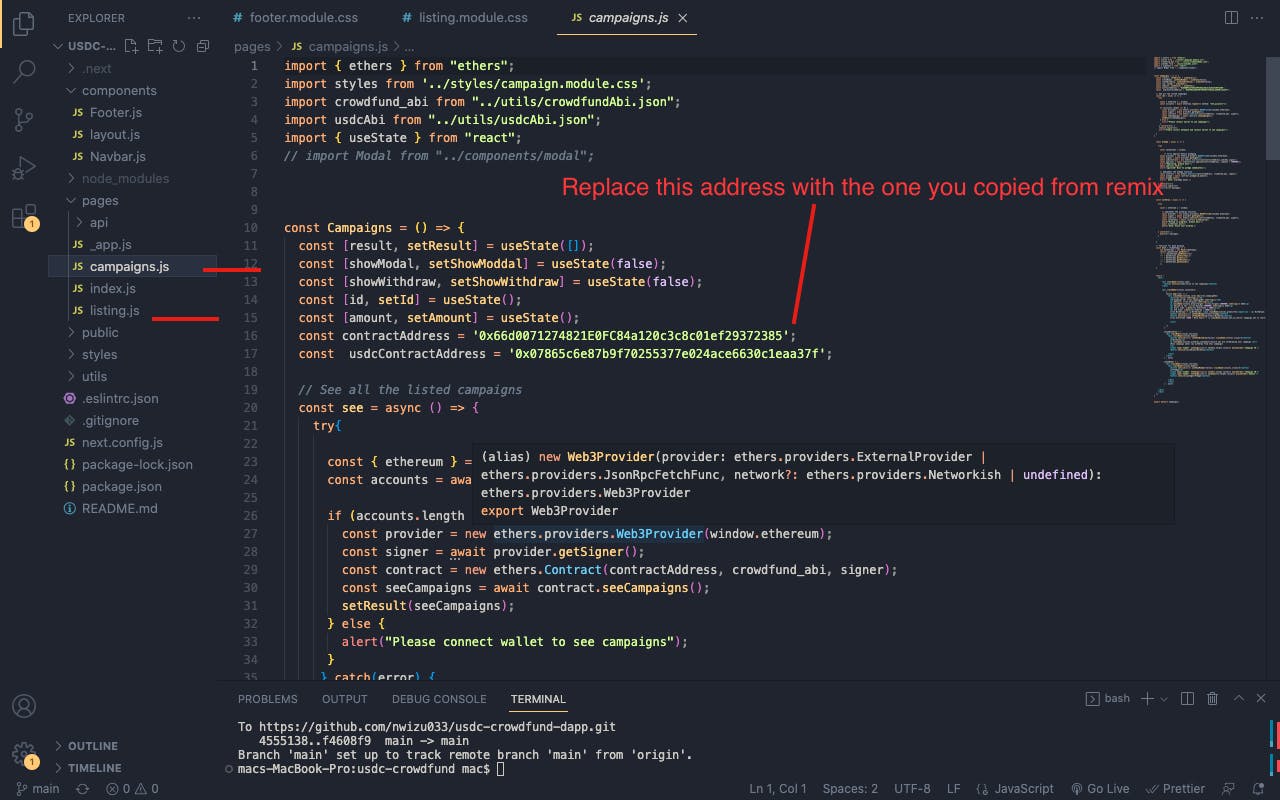
Then navigate to your pages folder and replace the contract address in the campaigns.js file and listing.js files respectively with the contract address you copied from remix.
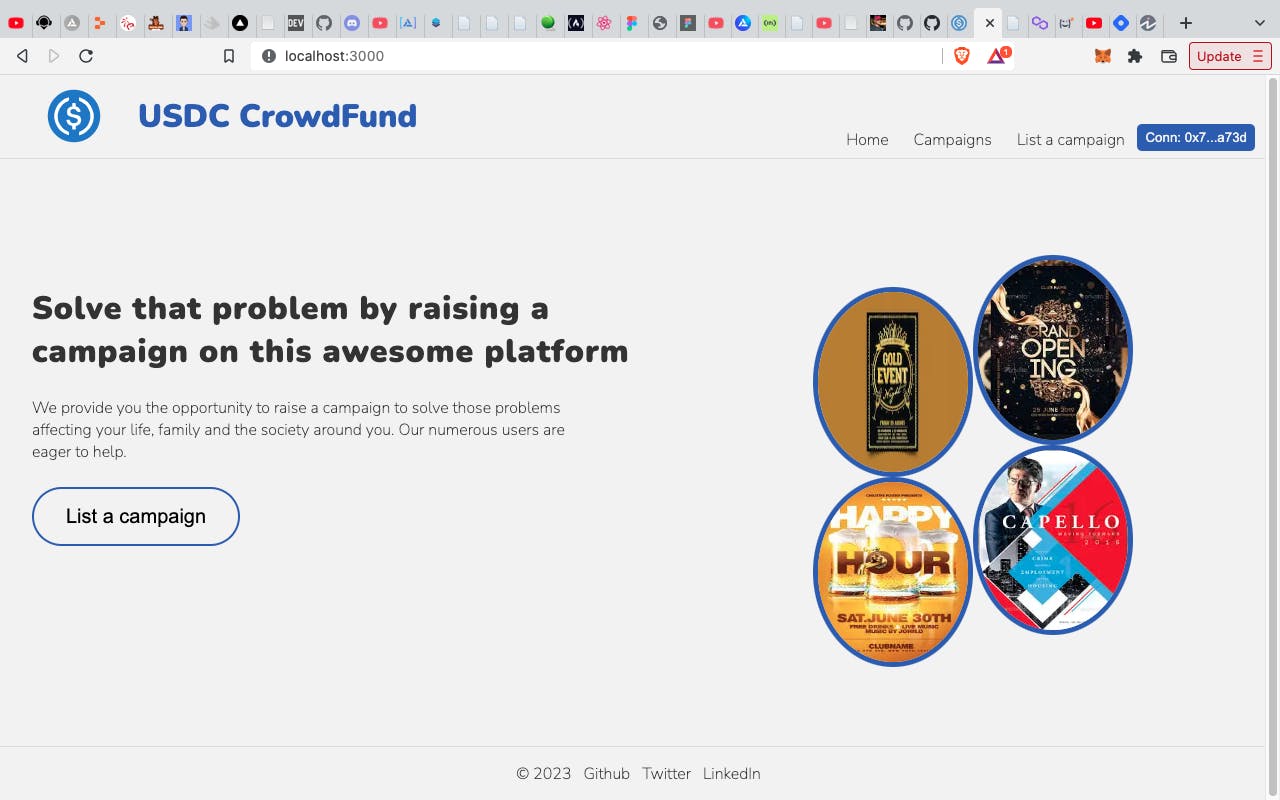
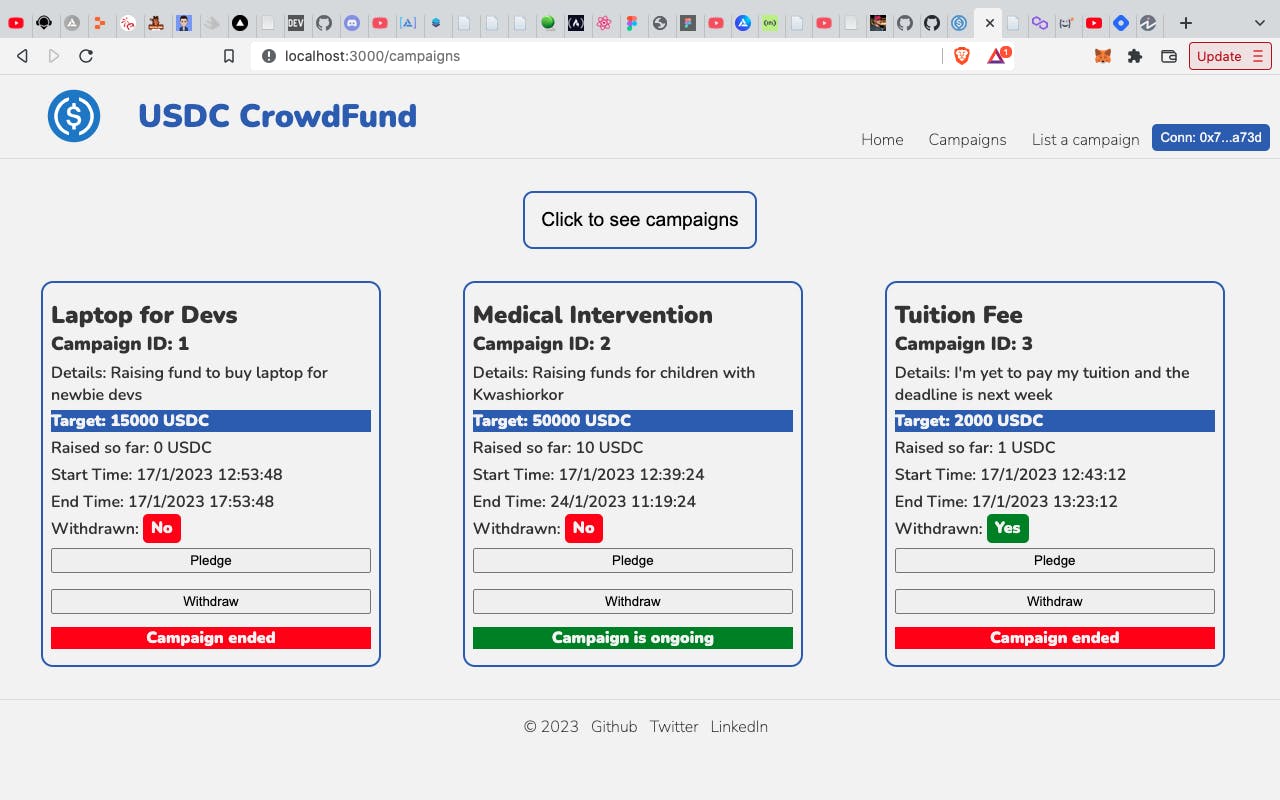
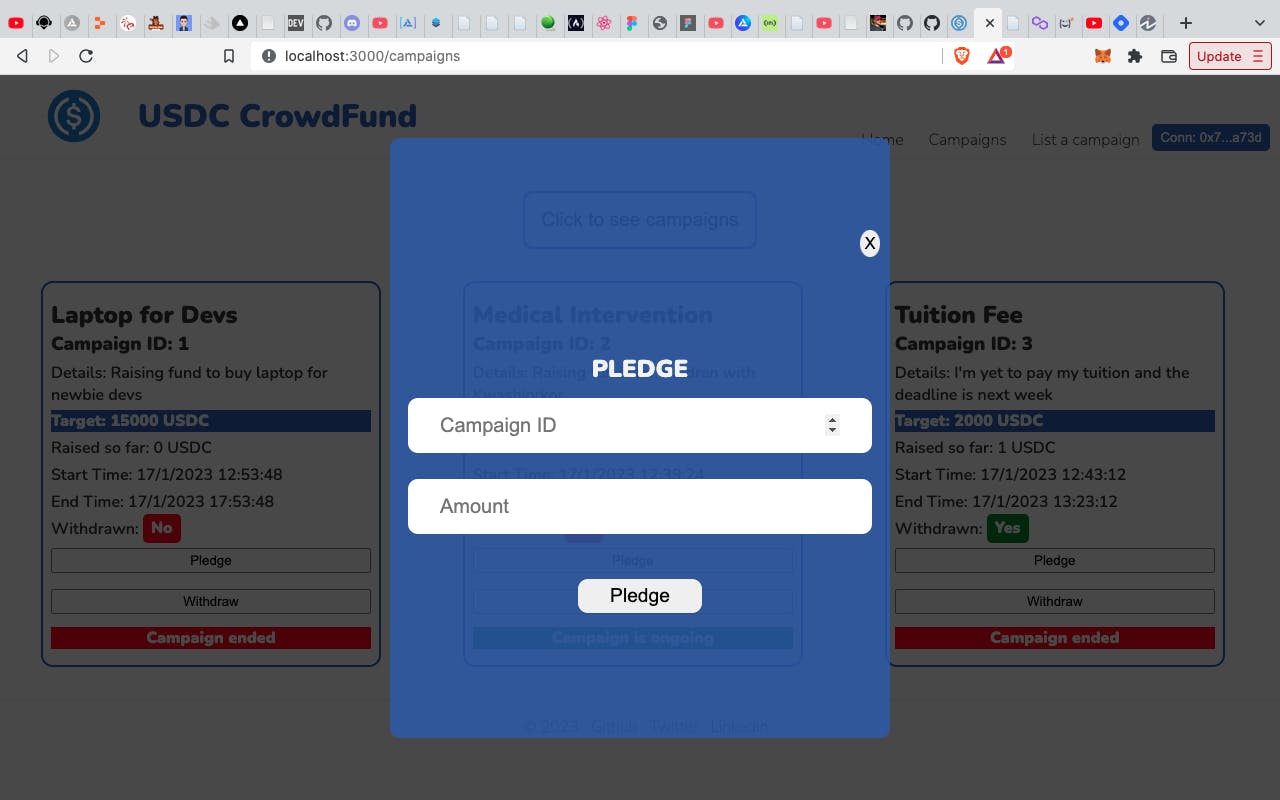
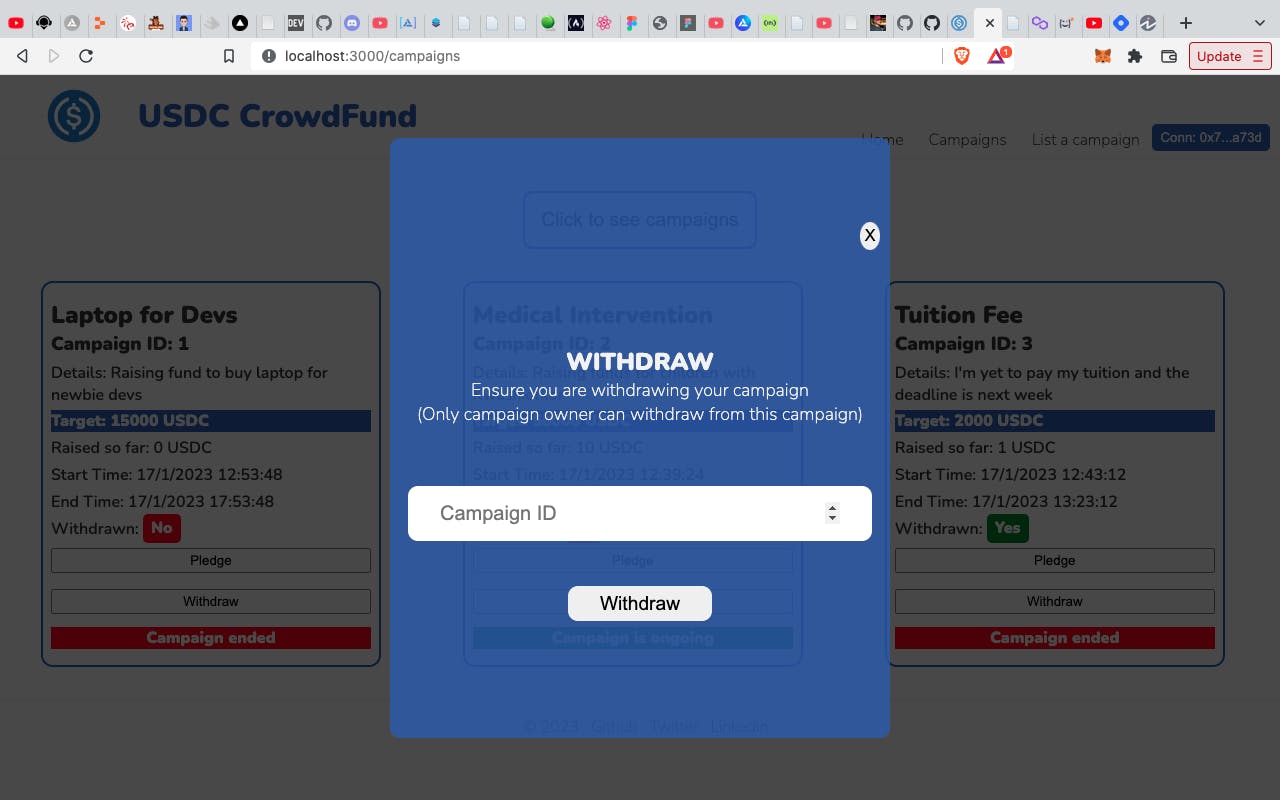
Now save your changes and use the front end to interact with your smart contract on localhost port 3000 that's already running when you ran those commands on your terminal.

Conclusion
Yes, we have learned how to build, deploy and interact with our USDC-based Crowdfund smart contract. We used Solidity for the contract, Ethers.js and Next.js for the front-end integration. Next, will be how to build and deploy this same contract using Hardhat framework. Watch this space.
